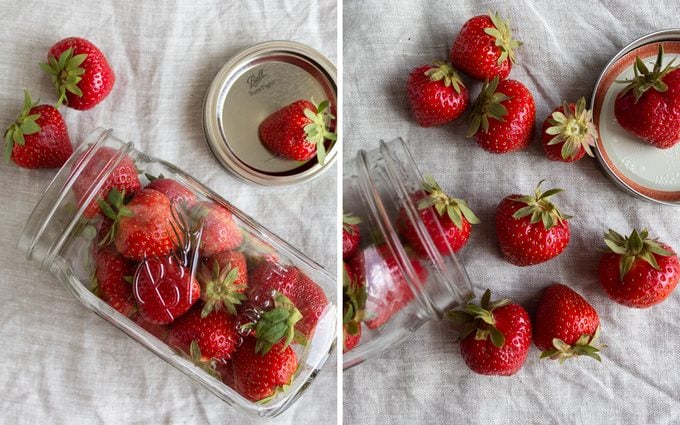

About This Method: Fresh, whole strawberries are sealed inside glass mason jars with metal lids and bands, then refrigerated.
How To Do It: Check through your strawberries to remove any that have mushy spots or mold. Place your unwashed strawberries in a glass mason jar, and stack them loosely so that they aren’t squishing each other. Tightly fasten the metal lid and band on the jar, then put it in the fridge.
Did It Work? Yes! This is our favorite of the six methods. If you don’t see any difference between the before and after photos of this method, it’s not a trick. After seven days the strawberries looked as fresh as they did on day one, with plump, firm fruit and fresh leaves. It was so satisfying to find the strawberries looked and tasted this perfect after a week in the fridge.
The Verdict: We love it!
No air can get into the sealed mason jars, and this seems to hold off the decay of the strawberries. There’s just enough natural moisture in the fruit that the berries stay firm and the leaves stay vibrant. When we opened the jar it made the same pssshh! noise that you hear when opening a soda: that’s the ethylene gas produced by the strawberries escaping. It’s important that the strawberries go into the jar unwashed, and that any iffy berries are removed so they don’t affect the rest.
Things to Remember When Storing Strawberries
No matter which storage method you decide to try, there are a few rules about storing fresh strawberries to know. All of these tips will help your berries stay fresher and better looking for a longer time.
Sort the berries
Just as one bad apple can spoil the bunch, one moldy or deteriorating strawberry will cause the rest of the berries to spoil faster, too. Check boxes of strawberries carefully at the store before you buy them. When you get your strawberries home, sort through them and remove any that have mold or look mushy.
Hulling the strawberries, or even just tearing off the leaves and stems, exposes the flesh of the fruit to air and bacteria, which will cause them to rot quickly. It’s best to leave strawberries whole with leaves and stems intact until you’re ready to use them.
Wait to wash them
It’s a good idea to wash berries, but wait to do this until just before you’re ready to use them. Strawberries absorb water quickly and once the surfaces are saturated they will quickly turn to mush or get moldy.
There are some recipes like chocolate covered strawberries, where you’ll want use the whole berries after washing. For these times, rinse the berries quickly in cold water, and handle them very gently. Then, spread them out on a tray lined with a clean dish towel to air dry. Turn them occasionally, so they can dry on all sides and around the leaves. Once they’re completely dry to the touch, use them right away.
Store in the refrigerator
Prep for dipping strawberries

- 1 quart fresh strawberries with stems
- 1-2/3 cups vanilla or white chips
- 2 tablespoons shortening, divided
- 1 cup (6 ounces) semisweet chocolate chips
Directions:
- Wash strawberries and gently pat until completely dry. Make sure all water is wiped off. I would let them dry on a towel for at least an hour to make sure all moisture is gone. Leave the stems on. It makes them look even prettier.
- In a microwave, melt vanilla chips or chocolate chips in a microwave safe bowl at 50% power for 1 minute; stir.
- Microwave for additional 30-second intervals, stirring until smooth. (many people add some shortening to thin out chocolate. Chocolate and vanilla chips will melt to a very useable coating. Other colors need a little help with thinning. I purchased "Paramount Crystals" for this purpose. It doesn't lose its shine and the chocolate stays on the berries better. I purchased the Paramount Crystals on Amazon. They truly are the way to go when working with chocolate wafers.
- Dip each strawberry until two-thirds of the berry is coated, allowing the excess to drip off.
- Place on a waxed paper-lined baking sheet; refrigerate for 30 minutes or until set.
- Melt chocolate wafers the same way at the white wafers. Once again you most likely will not need to thin the chocolate out. But if you choose to, I would add Paramount Crystals rather than shortening. Stir until smooth. It takes a little while to get the right consistency, but it's worth the wait.
- Dip each strawberry until one-third is coated, allowing the excess to drip off.
- Return to baking sheet; refrigerate for 30 minutes or until set. Yield: 2-1/2 dozen.


